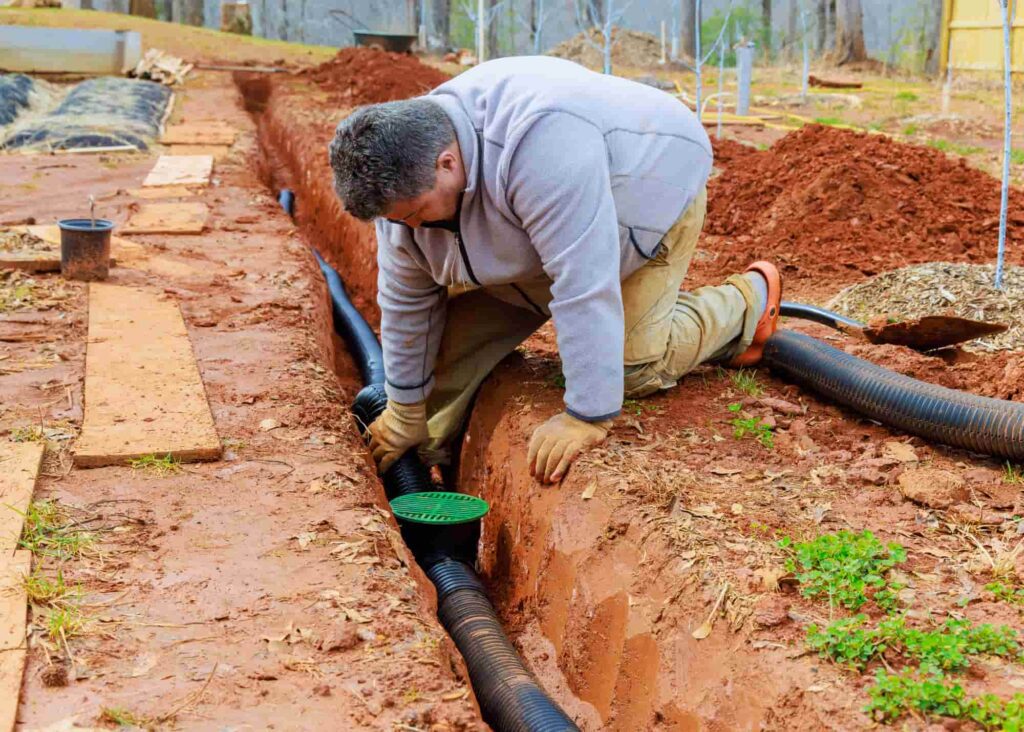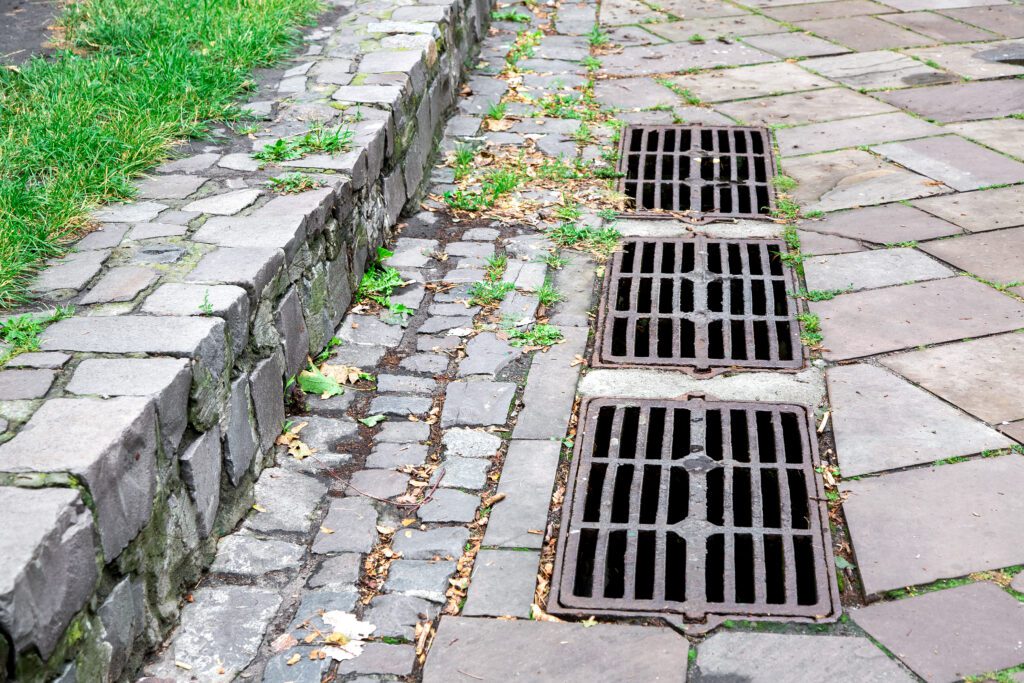


Installing a French drain involves many intricate steps, each of which can go wrong. Some mistakes are relatively easy to correct before the trench is covered, while others can lead to persistent standing water, clogged pipes, expensive excavation, or a drainage system that fails to do its job.
Although working with a professional drainage company is one of the best ways to avoid costly, time-consuming mistakes, you may choose to DIY a French drain project.
Whether you are planning your DIY French drain installation or troubleshooting a project that has gone off-course, it helps to understand how each part of the system works. Trench depth, pipe orientation, gravel selection, filter fabric, and the final outlet all affect how effectively water moves through the drain.
This guide covers five common French drain mistakes, how to recognise the warning signs, and what homeowners and drainage crews can do to correct them. It also explains what to look for in installation photos so you can check the work before the trench is covered.
Mistake #1: Miscalculating the Correct Trench Depth
The correct depth of a French drain depends on several factors, but the most important consideration is whether the system can collect water from the problem area and carry it to a suitable outlet.
A shallow drain may sit above the layer where water is accumulating. An unnecessarily deep trench can increase excavation costs, create safety risks, and make it difficult to establish a workable outlet elevation.
There is no single depth that works for every French drain. Some residential yard drains are relatively shallow, while foundation drainage systems and projects involving deeper groundwater may require a different design.
The following factors should guide the decision.
- Water source and soil conditions: The drain must be positioned to intercept the water it is intended to collect. A drain designed for shallow surface saturation may not work if the actual problem is deeper groundwater.
- Slope and outlet elevation: The trench must provide enough elevation change for water to move toward the discharge point. The outlet’s elevation may determine how deep the trench needs to be.
- Existing structures: Foundation depth, nearby utilities, tree roots, retaining walls, and other buried features can limit where the trench can safely go.
- Frost conditions: Freeze-thaw conditions can affect drainage performance, especially when outlets contain standing water or exposed pipe sections freeze. However, not every French drain must automatically be installed below the frost line. Depth and winter protection depend on the system’s purpose, local conditions, and design.
- Local requirements: Municipal stormwater rules, permits, and discharge restrictions may affect the location and depth of the installation.
Getting the pipe slope right
Depth and slope are related, but they are not interchangeable. A deep trench can still drain poorly if the pipe has flat sections, dips, or a reverse slope.
A commonly used design target for gravity drainage is a continuous slope of around 1%, where appropriate for the selected pipe and application. A 1% slope means a drop of 1 inch for every 100 inches of horizontal run, or approximately 1.2 inches over 10 feet.
For example, if a pipe run is 50 feet long, a 1% slope would require approximately 6 inches of fall from its starting point to its outlet. That is only a planning example: the required grade should be checked against the drainage design, pipe specifications, site elevations, and available discharge point.
The important thing is to measure the elevation along the entire route rather than checking only the beginning and end. A pipe can have the right overall fall and still contain a low section where sediment accumulates or water remains trapped.
How to fix a trench that is too deep or too shallow
If the trench is too deep, the crew should first establish the required pipe elevation and slope. Depending on the conditions, the correction may involve:
- Rebuilding the bedding with suitable compactable material beneath the drainage stone.
- Adjusting the trench profile to achieve the intended elevation.
- Rechecking the entire run with a laser level or suitable surveying equipment.
- Revising the route or outlet design if the existing elevation cannot provide a workable gravity discharge.
Do not simply fill an overly deep trench with loose soil or coarse sand and assume the problem is solved. Poorly prepared bedding can settle, changing the pipe’s slope after installation.
If the trench is too shallow, the preferred correction is often to re-excavate it to the required depth and grade, provided it can be done safely. If excavation is restricted by utilities, foundations, tree roots, or other obstacles, a drainage professional may need to redesign the route or consider a different drainage method.
Other possible corrections include improving the surrounding surface grading or adding appropriately located inlets where the design calls for them. A sump pump may be appropriate for some sites where gravity drainage is not possible, but it is not a shortcut for an incorrectly designed trench.
Before any excavation, identify buried utilities. In Illinois, homeowners and contractors should use 811’s Illinois utility-location guidance before digging.

Mistake #2: Using the Wrong Type of Drain Rock
French drains rely on a gravel or stone envelope to provide open spaces through which water can move toward the perforated pipe. But not every gravel product is suitable for this purpose.
The most important characteristics are the stone’s size, grading, cleanliness, and ability to maintain interconnected voids. The stone must allow water to move through the trench without being filled prematurely by fine sediment.
Clean, washed drainage aggregate is commonly used. A typical residential installation may specify approximately ¾-inch angular drainage stone, but the exact material should be selected for the pipe, trench design, soil conditions, and manufacturer’s recommendations.
The claim that every French drain requires rounded natural stones exactly 1.5 inches in diameter is too restrictive. Some systems use rounded stone, while many use clean, angular crushed drainage aggregate. The correct choice depends on the design.
Which gravel should you use?
Clean, washed drainage stone: Usually a suitable option when the stone is correctly sized for the design. Washing removes much of the fine material that could otherwise reduce the open spaces between stones.
Stone with excessive fines: Crusher run and other unwashed mixes can contain dust, sand, and small particles that fill the gaps needed for water movement. These products are generally unsuitable for the drainage envelope unless a specific engineered design calls for them.
Very small gravel: Fine or uniformly small material may not provide the void structure required by the design. Pea gravel is not automatically unsuitable in every drainage application, but it should not be substituted for specified drainage aggregate without checking its size and performance requirements.
Oversized stone: Larger stone is not necessarily better. If the stone size is incompatible with the pipe openings, trench dimensions, or filter design, it may create an unsuitable bedding arrangement or leave insufficient contact and support around the pipe.
Degradable or contaminated material: Stone that breaks down easily or contains soil and organic debris can introduce fine particles into the system over time.
How to fix rock selection issues
If the gravel has been purchased but not installed, check the supplier’s material description and compare it with the project specification before unloading it into the trench.
If the wrong material has already been installed, the appropriate correction depends on how much of the drain is affected and whether it is already showing symptoms.
- If the pipe and stone are still exposed, remove the unsuitable material and replace it with the specified clean drainage aggregate.
- If the trench has been covered and the drain performs poorly, inspect the accessible inlet and outlet first. Excavation may be necessary if the stone envelope is clogged or cannot provide adequate flow.
- If the material contains excessive fines, adding a pipe sleeve alone may not solve the problem. A sleeve can help protect the pipe in some systems, but it does not restore drainage voids throughout a contaminated gravel bed.
- If the gravel is clean but the system still performs poorly, investigate pipe slope, fabric selection, outlet restrictions, and the original drainage design before replacing materials unnecessarily.
A French drain’s gravel, filter fabric, and pipe work together. Correcting one component will not always fix a problem caused by another.

Mistake #3: Failing to Add the Correct Drainage Fabric
Filter fabric helps prevent surrounding soil from migrating into the drainage stone and gradually reducing its capacity. If soil particles fill the spaces between the stones, water may have a harder time reaching the pipe even when the pipe itself remains intact.
Two common mistakes are leaving out the filter layer entirely or choosing a fabric that does not suit the soil and drainage conditions.
You may see suitable materials described as geotextile fabric, filter fabric, or drainage fabric. However, not every product sold as landscape fabric is appropriate for a French drain.
Woven or non-woven fabric: Which is better?
Non-woven geotextile is commonly used in French drain installations because it can allow water to pass through while filtering soil particles. Nevertheless, it is not accurate to say that every woven fabric is unsuitable or that every non-woven fabric will resist clogging.
The right selection depends on factors such as:
- The particle size and distribution of the surrounding soil.
- The fabric’s opening size and permeability.
- The expected volume and direction of water flow.
- The risk of fine particles migrating into the stone.
- The manufacturer’s specification and the design of the drainage system.
Fine clay and silt can be particularly challenging because they may clog an unsuitable filter. In those conditions, a geotextile selected for the actual soil can be more important than simply choosing a product labelled “non-woven.”
The fabric must also be installed correctly. Depending on the system design, it may line the bottom and sides of the trench and fold over the drainage aggregate. Gaps, tears, poor overlaps, or soil mixed into the gravel during backfilling can undermine its purpose.
How to fix fabric issues
If the drain has not yet been covered, check that the fabric is the correct geotextile for the project and that the trench is properly lined. Keep the material clean while placing the aggregate and avoid tearing it with tools or sharp stone edges.
If the fabric has already been buried, do not excavate the entire drain solely because the fabric is not the type you expected. First check how the system performs and whether there are other signs of failure.
If the drain is sluggish, the crew should investigate the outlet, pipe slope, and visible signs of sediment before concluding that the fabric is responsible.
Where inspection confirms that soil has migrated into the drainage aggregate, the durable repair may require excavating the affected section, removing contaminated stone, replacing or correcting the filter layer, and rebuilding the system.
Adding another layer of fabric on top of a buried, contaminated system will not remove the sediment already blocking the stone. The repair must address the material that has accumulated inside the drainage envelope.

Mistake #4: Choosing the Wrong Kind of Pipe or Installing It Incorrectly
Selecting the right pipe is essential, but diameter is only one part of the decision. The pipe must be suitable for drainage, correctly perforated for its intended purpose, adequately supported, and connected to an outlet that can carry the collected water away.
A typical residential French drain may use a 4-inch drainage pipe, but larger or more complex projects may require a different size. The appropriate diameter depends on the amount of water expected, the length of the run, the number of contributing areas, and the drainage design.
Perforated versus non-perforated pipe
A French drain commonly uses perforated pipe within the gravel envelope so water can enter from the surrounding drainage material.
The pipe that carries collected water from that section to the final outlet is often solid, non-perforated pipe. This helps prevent water from leaking back into the ground along the discharge route.
Using solid pipe throughout a section that is supposed to collect subsurface water can prevent the system from doing its job. Conversely, using perforated pipe where the water needs to be carried away can allow the collected water to seep back into the soil before it reaches the outlet.
Pipe orientation: Do the holes face up or down?
For many conventional subsurface French drain designs, the perforations are positioned toward the bottom of the pipe, often around the lower sides. This allows water that has entered the gravel envelope to reach the lower pipe openings.
However, pipe orientation should not be treated as a universal rule for every drainage product or system. Some drainage pipes have specific installation markings, perforation arrangements, or manufacturer instructions. Surface-collection designs can also differ from conventional subsurface collection drains.
Before installation, check the pipe manufacturer’s instructions and the design specification. Do not rotate a pipe simply because a generic diagram shows a different orientation.
The key is to match the perforation arrangement to the drain’s intended function, then maintain that orientation throughout the run.
Other pipe-selection mistakes
Using a pipe that is too small. A pipe may struggle to carry the expected flow, especially if it receives water from several sources.
Using a pipe that is not designed for the installation. Pipe strength and construction should be suitable for the depth of burial and any expected loading from soil, vehicles, or nearby structures.
Allowing the pipe to sag. Flexible pipe can develop low points if the bedding is uneven or poorly prepared. These sections can retain water and sediment.
Creating a reverse slope. If part of the pipe rises in the direction of flow, water may collect behind that point rather than moving consistently toward the outlet.
Leaving out suitable access points. Cleanouts or accessible inspection points may be useful in systems where maintenance or flushing is anticipated. Their location should be planned rather than added as an afterthought.
How to fix the wrong drainage pipe
If the pipe is still exposed, correct the issue before adding the remaining gravel and backfill. Confirm the pipe type, diameter, orientation, bedding support, and slope.
If the drain has already been buried, the crew should first assess its performance and inspect accessible sections. A partial repair may be possible if the fault is localised and the remaining pipe is suitable.
If the pipe is crushed, incorrectly perforated, too small for the intended flow, or installed with significant sagging, excavation and replacement may be necessary.
Adding a second pipe parallel to the original one is not automatically the best fix. It may increase capacity in a correctly designed system, but it will not correct a blocked outlet, reverse slope, unsuitable gravel, or a fundamentally wrong collection route.
Mistake #5: Getting the Outlet Wrong or Taking on Too Much of the Project
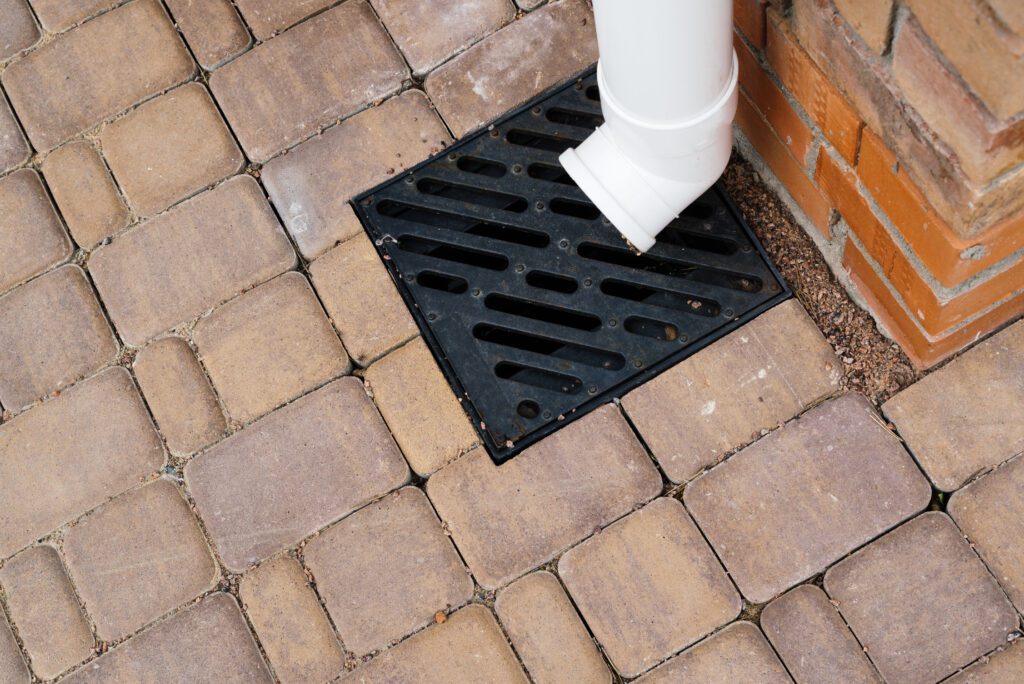
Even when trench depth, gravel, fabric, and pipe are correct, a French drain can still fail if the outlet is blocked, too high, poorly protected, or directed somewhere unsuitable.
A French drain does not make water disappear. It collects water and moves it somewhere else. The outlet is therefore part of the system design, not an afterthought.
Common outlet mistakes
The outlet is too high. If the outlet elevation prevents water from flowing out by gravity, water may remain in the pipe or drainage trench.
The outlet is blocked. Soil, leaves, debris, ice, or damaged fittings can restrict discharge.
The outlet is still perforated. If the final section is supposed to carry water away from the collection area, a perforated discharge line may allow it to leak back into the ground before reaching the intended outlet.
The outlet causes erosion. Water discharged at high speed onto bare soil can create a new erosion problem.
The discharge point is unsuitable. Water should not be directed toward a foundation, onto neighbouring property, or into a location prohibited by local requirements.
The outlet freezes or remains submerged. Winter conditions and high receiving-water levels can restrict discharge, leaving the drain unable to perform as intended.
How to correct outlet problems
A drainage crew should verify the outlet elevation and inspect the entire route for restrictions. If the system is intended to operate by gravity, the discharge line must have a workable fall to the outlet.
Where the outlet is blocked, the crew should clear the obstruction and check for damage or recurring causes. If the outlet is too high or the site does not permit a workable gravity route, the drainage design may need to change. In some cases, a properly designed sump and pump may be considered.
Where water is causing erosion, the outlet may need a suitable splash pad, stone protection, or another approved energy-dissipation measure. Where winter conditions are a concern, the crew should assess the outlet’s exposure, drainage after use, and the potential for ice obstruction.
The outlet must also comply with local stormwater rules. Do not assume that a storm sewer connection, curb discharge, or discharge onto another property is permitted without checking the applicable requirements.
When to call in a professional
DIY projects can be an exciting challenge and a budget-friendly way to address landscaping problems, but they can also become complicated. A major drainage project may involve excavation, utility clearance, grade calculations, soil conditions, material selection, and local discharge requirements.
It is important to know when you need to take a step back and call in the professionals.
A landscaping company can assess the source of the water, determine whether a French drain is appropriate, and identify any grading or outlet issues before further money is spent on a system that does not solve the problem.
French Drain Failure Symptoms
A French drain does not always stop working all at once. Often, its performance declines gradually, with symptoms appearing in the yard before the underlying problem becomes obvious.
The table below connects common warning signs to likely causes and the remedial work a drainage crew may carry out after inspection.
| Failure symptom | Possible cause | How crews investigate | Typical remediation |
| Standing water remains after rain | Blocked outlet, inadequate slope, clogged gravel, or an undersized system | Inspect the outlet, check elevations, and observe flow during rainfall or a controlled test | Clear the outlet, correct local grade defects, or repair/rebuild the affected section |
| The drain works during light rain but fails during heavy storms | Insufficient capacity, excess runoff, or poor inlet placement | Assess the contributing area, water volume, and collection points | Redesign inlet placement, improve surface grading, or increase capacity where justified |
| Water backs up near the beginning of the drain | Outlet restriction, a high point or reverse slope, or a blockage downstream | Check outlet flow and survey the pipe route | Clear the obstruction or excavate and correct the affected pipe section |
| Water reappears along the trench after the drain discharges | Perforated pipe in the wrong location, leaks in the discharge line, or insufficient capacity | Inspect the transition from perforated collection pipe to solid discharge pipe | Repair connections and replace unsuitable pipe sections |
| The lawn becomes soggy again after a few years | Sediment migration, clogged stone, root intrusion, or a change in site runoff | Inspect accessible sections and assess the soil and drainage envelope | Clean where feasible, repair local damage, or excavate and rebuild contaminated sections |
| The outlet produces little or no flow while the yard is saturated | Blocked outlet, inadequate elevation drop, frozen discharge, or an incorrectly located collection line | Check the outlet, pipe elevations, and receiving area | Clear or protect the outlet, revise the route, or redesign the system |
| The trench settles or develops a depression | Poor backfill compaction, bedding settlement, or pipe deformation | Inspect the surface profile and, if needed, expose the affected section | Rebuild the bedding, replace damaged pipe, and restore the grade |
| Water appears near a pipe joint | Disconnected fitting, damaged pipe, or movement in the trench | Inspect the accessible joint or use appropriate pipe inspection methods | Reconnect or replace the damaged section and stabilise the bedding |
| The drain freezes or stops discharging in winter | Exposed or poorly drained outlet, retained water, or unsuitable installation conditions | Inspect the outlet and the route for trapped water and ice | Correct the discharge details and address vulnerable exposed sections |
| The drain appears to work, but the foundation remains wet | Wrong collection location, multiple water sources, or a problem unrelated to the drain | Assess the foundation, grading, gutters, groundwater, and other sources of moisture | Correct the underlying cause and redesign the drainage plan if necessary |
A practical inspection sequence for drainage crews
Before digging up the whole system, crews can work through a structured inspection.
- Check the visible outlet. Look for debris, sediment, damage, ice, or a receiving area that is already saturated.
- Observe the problem area. Note where water collects and whether it follows the same pattern after each rainfall.
- Check accessible inlets and cleanouts. Remove safe, accessible obstructions and look for signs of sediment or standing water.
- Verify the route and grade. Use suitable measuring equipment or inspection methods to identify flat sections, reverse slope, or settlement.
- Assess the likely failure point. Where the cause is not visible, a camera inspection or carefully targeted excavation may help.
- Repair the confirmed problem. Replace or correct the affected components, then test the system before restoring the surface.
A successful repair should address the reason the drain failed rather than simply cover the symptoms with fresh soil or gravel.
How to Document a French Drain Installation with Field Photos
Field photos help homeowners and contractors verify the work before critical components disappear beneath the backfill. They also make it easier to investigate future problems without relying entirely on memory.
For a useful project record, capture the following stages.
- Before excavation: Photograph the standing water, soggy lawn, foundation area, or erosion that prompted the work. Include a wider view showing the affected area and nearby structures.
- Trench and depth: Photograph the open trench and the measured depth. Include the measuring tool and note the location along the route.
- Bedding and grade: Show the prepared base and the equipment used to verify the pipe elevation. If possible, record measurements at several points along the route.
- Filter fabric: Photograph the geotextile lining before placing the stone. Capture overlaps and any product label or specification.
- Drainage stone: Take a close-up of the aggregate and a wider photo showing how it surrounds the pipe. Record the material specified for the project.
- Pipe orientation and joints: Photograph the perforations, manufacturer markings, pipe bedding, connections, and transition to the solid outlet pipe.
- Outlet: Show the final discharge point, its elevation where relevant, and any erosion protection or approved connection.
- Testing before backfill: Document a suitable controlled flow test where appropriate. Record whether water reaches the outlet and whether there are visible leaks, obstructions, or pooling along the route.
- Final restoration: Photograph the completed landscape and, if practical, the same area after a later rainfall.
Don’t Pay for a Failed System Twice
A French drain can help manage persistent water problems, but only when it is designed for the site’s conditions and installed correctly. The right trench depth, suitable drainage aggregate, compatible filter fabric, properly oriented pipe, and a reliable outlet all contribute to performance.
If a DIY installation has gone wrong, do not assume the entire system must be replaced. Start by identifying the failure symptoms, inspecting accessible components, and determining whether the problem comes from the pipe, gravel, fabric, slope, or outlet. A targeted repair may be possible, but a drain with widespread contamination, poor grading, or a fundamentally unsuitable design may need more extensive work.
At Ware Landscaping, a drainage project should begin with the problem the property needs to solve not simply with digging a trench. The goal is to select a system that suits the site, manages water effectively, and avoids shifting the problem to another part of the property.
Check out the Ware Landscaping portfolio for examples of its work and other services. When you are ready to discuss your drainage issue, contact Ware Landscaping to arrange an assessment and request a quote.