

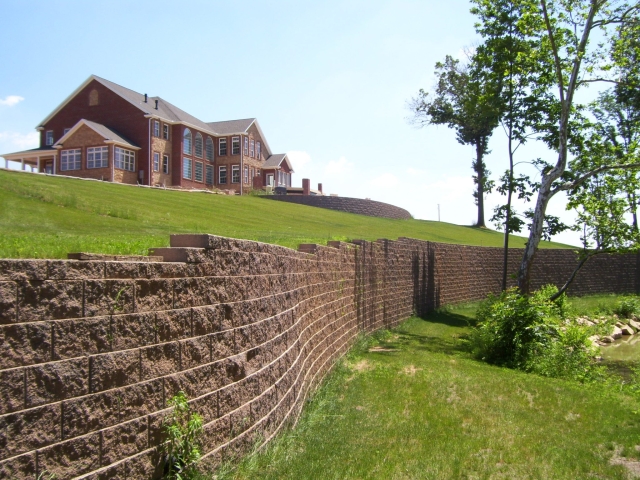
When it comes to building a retaining wall that lasts, what you put underneath it matters just as much as the wall itself. The retaining wall base is the unsung hero of your landscape; it carries the weight, keeps the structure level, and holds everything together through rain, freeze-thaw cycles, and shifting soil.
So what’s the best base material for a retaining wall? And how much gravel do you actually need? Let’s break it all down.
Why Your Retaining Wall Base Material Matters
Think of your retaining wall like a house. You wouldn’t build on sand and expect it to stand for decades. The same logic applies here. A poorly prepared base is the number one reason retaining walls tilt, crack, and fail prematurely.
A compacted, stable retaining wall gravel base will:
- Prevent shifting and tilting over time
- Promote proper drainage and reduce hydrostatic pressure
- Extend the lifespan of retaining wall blocks and natural stone alike
Whether you’re dealing with heavy Chicago-area rainfall, freeze-thaw cycles, or clay-heavy soil, the right base material makes all the difference.
Don't Let a $50 Base Mistake Cost You $10,000
A leaning wall is a failing wall. Skip the DIY guesswork and get a structural foundation engineered to survive the Illinois freeze-thaw cycle.
Request a Free QuoteBest Base Materials for a Retaining Wall
Not all gravel is created equal. Here are the top crushed stone base options most professionals rely on:
-
3/4″ Minus (Rock Screenings)
Also called “crushed stone with fines,” this compacts tightly into a solid, flat base. It’s ideal for retaining wall blocks and very DIY-friendly.
-
Crush and Run (ABC Stone)
A mix of crushed rock and stone dust that delivers excellent compaction. Widely used under roads and patios, and one of the most stable base material options for retaining walls.
-
#57 or #78 Angular Stone
Angular stones between 1/2 and 3/4 inch. These offer strong drainage and resist shifting, making them a go-to choice in freeze-prone climates.
-
Paver Base
Finely crushed stone that’s easy to level and compact. Readily available at hardware stores and great for smaller garden wall combos.
-
Class I–III Backfill Aggregate
Construction-grade material that meets specific gradation and compaction standards. Typically specified by engineers for taller or load-bearing walls.
The Pea Gravel Mistake (Don’t Do This)
You’ll see pea gravel recommended in some places as a retaining wall gravel base. It sounds appealing smooth, easy to shovel, readily available.
It’s the wrong call.
Pea gravel doesn’t compact. Those rounded stones roll under pressure, which means the wall shifts, drainage becomes inconsistent, and stability is compromised over time. Oregon State University’s Extension program specifically warns against rounded rock under retaining walls for this reason.
That said, pea gravel has a useful role: behind the wall as drainage fill. Under it? That’s a firm no.
How Much Gravel Behind a Retaining Wall?
This is one of the most commonly asked questions and one the original installation often gets wrong.
Industry guidelines are clear: at least 12 inches of granular backfill (crushed stone or similar aggregate) should sit directly behind the wall to allow proper water drainage. For walls over 4 feet tall, a drainage zone of 12–16 inches wide is the standard.
Without adequate gravel backfill, water accumulates behind the wall and builds hydrostatic pressure one of the leading causes of retaining wall failure, especially in areas with heavy rainfall or high water tables.
A few key rules for gravel behind your retaining wall:
- Use coarser, angular gravel (not rounded pea gravel) to maximize water flow
- Install a perforated drain pipe at the base of the wall within the gravel zone
- Place landscape fabric between the gravel backfill and native soil to prevent migration and clogging
- Add 10% extra material to account for compaction and voids
Compaction: The Non-Negotiable Step
Even the right base material will fail without proper compaction. Here’s how to do it correctly:
- Dig a trench 4–6 inches deep for standard walls (deeper for taller structures up to 8 inches for walls over 4 feet)
- Bury the first course of blocks approximately 10% of the total wall height below grade for stability
- Lay your crushed stone base in 2-inch layers, compacting each pass with a plate compactor
- Check for level front-to-back and side-to-side before placing your first course
According to Allan Block’s installation guidelines, angular crushed stone locks together far better than smooth gravel when compacted, providing the critical interlocking support that keeps retaining wall blocks level over time.
How to Organize Your Retaining Wall Project: Step by Step
If you’re wondering how to set up a retaining wall correctly from scratch, here’s the process that professionals follow:
Step 1 Mark and Excavate: Define your wall line, then dig your trench. A 3-foot wall typically needs a trench 10–12 inches deep (6 inches of gravel base plus buried block depth).
Step 2 Lay the Gravel Base: Add your crushed stone base material in 2-inch lifts, compacting each layer. Use a screed board to level it out.
Step 3 Set First Course of Blocks: Place your first row of retaining wall blocks on the compacted base, half-buried below grade. Check for level in all directions.
Step 4 Add Gravel Backfill: As you build up, continuously fill the space directly behind the wall with angular gravel. Do not use clay-heavy native soil here.
Step 5 Install Drainage Pipe: Place a perforated pipe at the base of the wall within the gravel zone, daylighting it at either end to redirect water away from the structure.
Step 6 Backfill and Finish: Once the gravel zone is complete, you can backfill the remaining space with compacted native soil and finish with sod or plantings.
Climate and Soil: Local Conditions Matter
For Midwest homeowners particularly in the Chicago suburbs #57 angular stone is a common recommendation because it allows water to pass freely while providing firm resistance against frost heave. Clay-heavy soil, which is prevalent across DuPage and Kane counties, expands when wet and contracts when dry, putting additional pressure on any retaining structure. A well-compacted, well-drained crushed stone base is your best defense.
Retaining Wall Base Materials
| Material | Best Use | Compacts? | Drains Well? |
| 3/4″ Minus | Block walls, DIY projects | Excellent | Yes |
| Crush and Run | Long-lasting base | Excellent | Yes |
| #57/#78 Angular Stone | Freeze-prone areas | Good | Excellent |
| Paver Base | Small garden walls | Good | Yes |
| Pea Gravel | Drainage backfill ONLY | No | Yes |
Don’t Let a Poor Base Ruin a Beautiful Wall
A retaining wall is a serious investment in your property. Skimping on the base material or skipping the gravel backfill leads to the tilting, bulging, and cracking that homeowners dread. Stick with angular, crushed stone compacted in layers, put a minimum of 12 inches of drainage gravel behind the wall, and your structure will stay strong for decades.
Ready to Build It Right the First Time?
At Ware Landscaping, we’ve designed and built retaining walls across Naperville, Hinsdale, Wheaton, and the greater Chicago suburbs and we handle every detail, from precise excavation and base compaction to final sod installation. We also integrate drainage solutions directly into hardscape projects, so your wall doesn’t just look good, it actively protects your property.
Don't Let a $50 Base Mistake Cost You $10,000
A leaning wall is a failing wall. Skip the DIY guesswork and get a structural foundation engineered to survive the Illinois freeze-thaw cycle.
Request a Free QuoteFrom Structural Support to Outdoor Sanctuary
A great retaining wall does more than hold back soil, it creates the foundation for your family’s memories. As seen in our Complete Outdoor Makeovers, Ware Landscaping handles the entire lifecycle of your project: from precision excavation and base compaction to the final lighting and sod installation.
Ready to reclaim your sloped yard and create a beautiful living space? SCHEDULE YOUR DESIGN CONSULTATION