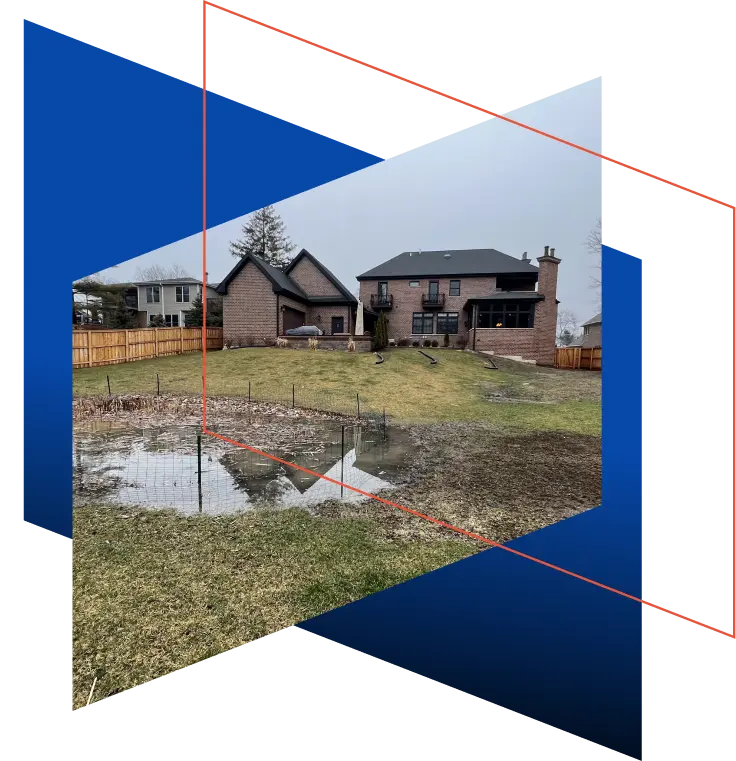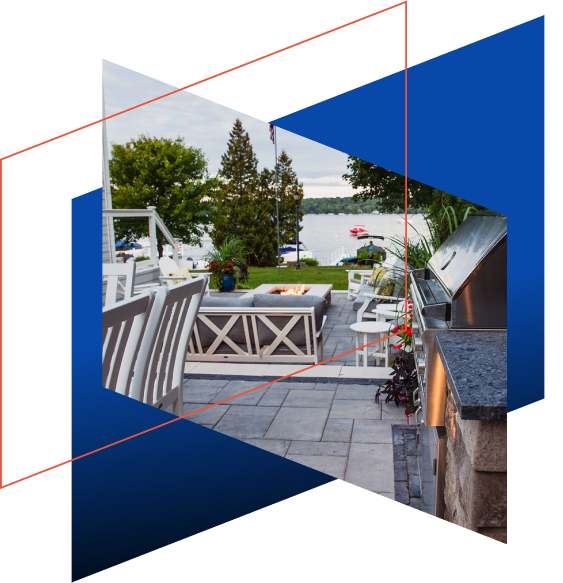
Imagine stepping out your back door into a space that feels like a resort. Your yard turns into a hub for family meals, late-night chats, and easy entertaining. This guide walks you through a full backyard makeover with paver patios, multi-level designs, and smart outdoor kitchens. You’ll see how these elements blend to create a spot you love to use year-round.
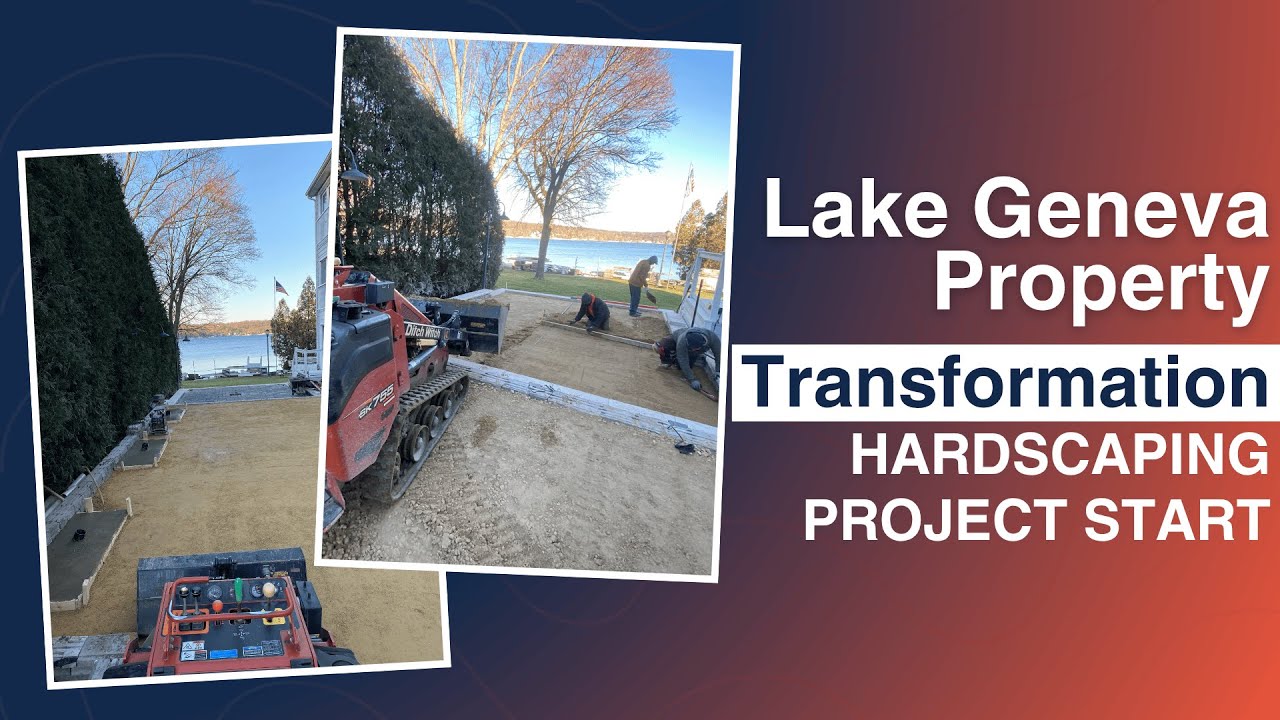
Outdoor Space Renovation
Elevating Your Outdoor Living Space
A top-tier hardscaping job brings together patios, kitchens, and cozy spots in one smooth flow. Think of it as stacking layers that match your home’s look while fixing yard slopes. In this project, we start right at the door with pavers that lead to steps and open areas for fun.
The plan covers everything from stone walls to fire pits. It solves common yard issues like uneven ground and boring fences. You end up with a space that boosts your home’s value and your daily joy.
Homeowners pick these setups for their mix of style and use. They handle big crowds or quiet evenings with ease. Key is tying it all to your house so it feels like an extension inside.
Why Multi-Level Design is the New Standard for Luxury Backyards
Tiered yards add depth and make sloped land work better. You get separate zones without losing flow. Smooth steps keep things safe and pretty.
These designs hide grade changes that might trip you up. They let you enjoy views from every spot. Plus, they fit more features like seating or plants.
In luxury setups, levels create private nooks. One area for grilling, another for relaxing. It turns a plain yard into a smart, inviting place.
Section 1: Designing the Multi-Tiered Paver Patio Foundation
Start by matching the patio to your home’s base level. Pavers go flush with the door for easy access. Then, add two steps down to reach the main yard area.
This keeps the top spot even with your foundation. It gives room for tables and chairs without bumps. The steps span about 18.5 feet across, making a wide, welcoming drop.
Plan these drops to fit your yard’s slope. They prevent water pooling and add a grand feel. Always check local codes for step height to stay safe.
Material Selection
Pick pavers that shine when wet for a rich color pop. These hold up to weather and foot traffic. They lock together tight for a solid base.
Ledger stone caps top off walls with a clean edge. This stone adds texture that catches the eye. It resists cracks and fades less over time.
Durability matters in outdoor spots. Wet pavers show their true shade, so test samples first. Mix in gravel under for drainage that lasts.
- Choose pavers in earth tones to blend with nature.
- Use stone facing on steps for grip and style.
- Seal everything early to fight stains.
Integrating Structural Walls and Retaining Elements
Build small structural walls to hold back soil shifts. They frame the edges without taking over. Place them where the ground drops most.
Retaining walls use the same stone for unity. Caps on top make them double as benches. Keep them under four feet high for simple builds.
These elements manage big changes in yard height. They stop erosion and create flat play zones. Add drains behind to keep water from building up.
In this setup, walls bookend the steps. They guide your eye and protect plants nearby.
Crafting the Ultimate Outdoor Kitchen Hub
Set the main kitchen at nine by three feet for easy reach. It sits close to the house door. This size fits counters and tools without crowding.
Place it where you can grab food fast from inside. The spot flows into the patio for smooth serving. Keep counters at waist height for comfort.
This hub becomes your cooking heart. It handles meals for four to twelve with room to spare. Think stainless steel for easy cleanups.
Strategic Appliance Placement and Grill Zones
Put one grill near the kitchen for quick flips. Add a second across a seat wall for guest chats. This spreads out the action.
The layout lets cooks move without bumping elbows. Grills face open space to vent smoke away. Link them with paths for easy flow.
Two zones mean more fun spots. One for burgers, another for veggies. It cuts down on kitchen trips inside.
- Grill one: By the main counter for daily use.
- Grill two: In the lounge area for parties.
- Add shelves below for tools and spices.
Building the Aesthetic Backing: From Fence to Feature Wall
Swap a plain fence for a stone wall behind the kitchen. It hides the yard edge and adds height. The wall reaches up to block wind and peeks.
Stone matches the patio for a pulled-together look. Build it sturdy to hold shelves or lights. It turns a blank spot into a focal point.
This change boosts privacy without closing in. Plants at the base soften the hard lines. You gain a backdrop that glows at night.
Incorporating Seating Areas and Fire Features
Run seat walls along the grill zones to link them. These low walls let folks perch while you cook. They span the space for easy talks.
Build them from the same pavers for match. Caps on top add comfort without cushions. Keep seats about 18 inches high.
They guide foot traffic and fill empty spots. Guests sit close but not in the way. Add pillows for extra coziness on cool nights.
In this yard, walls connect both grills. They create a loop that pulls people together.
Selecting the Perfect Fire Feature Placement
Drop the fire pit one level below the main patio. Debate circle for soft curves or rectangle for clean lines. Place it central for all to see.
This spot draws eyes and warms the air. Surround it with pavers for safe edges. Keep it six feet from walls to avoid heat damage.
A lower level makes it feel snug. Add gas lines for easy starts. It shines as the evening star.
- Circle pit: Fits round seating nicely.
- Rectangle: Blends with straight steps.
- Test spots for wind before digging.
Actionable Tip: Planning for Utility Access (Electrical Considerations)
Electric runs can snag on yard jobs. Map wires early for lights and outlets. Bury them deep to dodge shovels.
This project’s electric ties into kitchen plugs and path lamps. Hire pros to avoid shocks or fires. Test every spot before pouring concrete.
Smart planning saves headaches later. Use weatherproof boxes for outdoor safety. It powers your fun without fuss.
Advanced Lighting Design for Ambiance and Safety
Point up-lights at stone walls to show off textures. They cast glows on steps for night walks. Low voltage keeps it simple and safe.
Place lights every few feet along drops. This lights paths without glare. Motion sensors add security.
The effect makes walls pop like art. It guides you down levels with soft beams. Save energy with LEDs that last years.
Landscape Lighting Integration
Shine up-lights on trees to stretch the yard. Paint trunks black first for contrast. Tuck lights in beds to hide them.
This pulls focus to branches at dusk. Mix with path lights for full coverage. It turns plants into shadows that dance.
Keep existing trees to save cash. Lights make them stars without big changes.
Layering Light for Function and Mood
Bright task lights over grills help with chops. Softer ones near the fire pit set a calm tone. Switch them for the party’s vibe.
Zones let you dim for romance or amp for games. Timers keep it hands-free. Balance keeps eyes comfy all night.
Layering builds depth in your space. It shifts from work to play with a flip.
Final Landscaping Touches and Zone Separation
Defining Zones with Step-Down Landscaping Beds
Tuck beds one foot inside the steps. They hold flowers that spill over edges. This softens the hard pavers.
Plants add color and screen views. Pick low growers for easy care. Mulch keeps weeds down.
Beds mark shifts between levels. They frame the fire pit without crowding.
Managing Major Grade Changes with Large Steps
Use an eight-foot step then a six-foot one for big drops. Wide treads make them feel like landings. Railings help if slopes steepen.
These handle yard dips without stairs everywhere. Pavers on top grip better than wood. Space them for rest midway.
In this design, steps lead to lower lounges. They open up the yard’s full reach.
Maximizing Usable Space Across All Levels
Stretch the patio far with smart tiers. Top level fits dining and bars. Lower ones hold grills and pits.
Each spot serves a role yet links tight. You gain feet of flat ground from slants. Flow keeps it one big yard.
This setup packs in fun without waste. Lounge here, eat there—all connected.
The Apex of Outdoor Entertainment Design
This project nails a top patio with paver steps and stone walls. The outdoor kitchen anchors cooking zones with grills and seats. Fire pit and lights wrap it in warmth and glow.
Landscaping beds tie levels with green touches. Electric plans power it all safely. You get a yard built for years of memories.
Every part works together for easy use. From door to pit, it’s smooth and smart.
Looking Ahead: Enjoying the Transformed Space
Your new backyard waits for barbecues and stargazing. It raises your home’s charm and cuts stress. Start planning yours today—grab a sketch and call a pro.
This kind of upgrade pays off in laughs and good times. Dive in and watch your yard bloom. What feature will you add first?