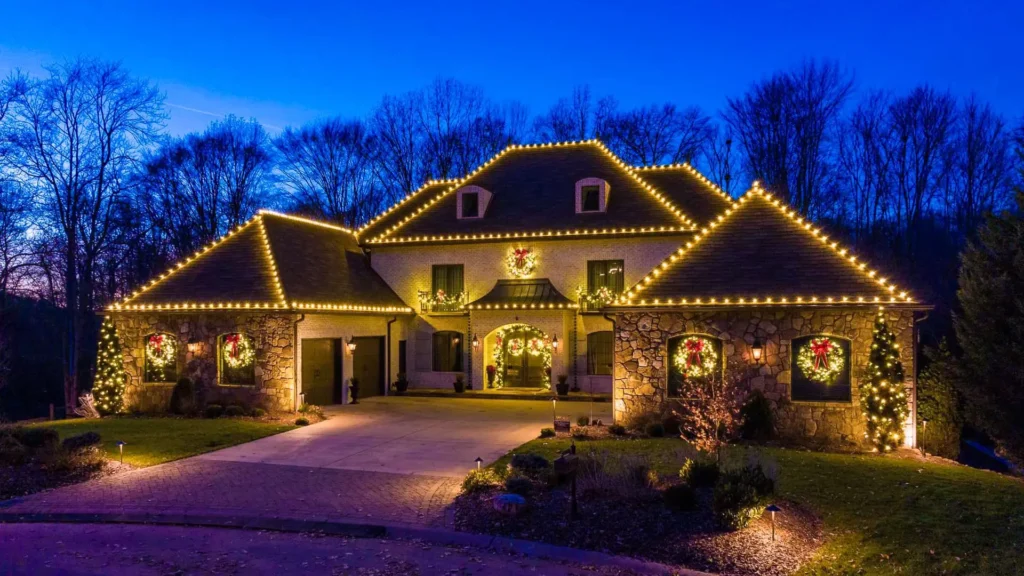
Installing Christmas lights on your roof looks easy until you’re on a ladder, fighting cold air, shaky footing, and those roof angles that feel steeper in real life than they look from the ground. The goal is simple: a clean display, no injuries, no roof damage, and no wasted hours. This guide walks you through everything you need—facts, safety steps, tools, roof‑specific techniques, and the right way to take lights down without ruining your gutters.
Start With Safety (Always)
Most holiday injuries don’t happen because someone used the wrong light—they happen because someone slipped. Roof installs come with real risks, especially when you add winter conditions. Before anything else, protect yourself.
- Only install lights on dry days. Wet shingles, icy tiles, and metal roofs turn into slides.
- Use a full‑body harness, lifeline, or roof anchor for anything above ground level.
- Wear slip‑resistant shoes and gloves with grip.
- Never work alone—your assistant stabilises the ladder and hands you what you need.
- Use a ladder with slip-resistant feet and keep the base on solid, level ground.
- If your roof is steep or high: hire a professional. The Consumer Product Safety Commission reports thousands of holiday fall injuries every year.
Safety isn’t optional. One wrong step in winter conditions is enough to ruin the season.
Gather the Right Tools and Materials
Using the right materials isn’t just about convenience—it’s what prevents leaks, electrical issues, and fire hazards.
Recommended materials:
- Outdoor-rated LED lights (C7/C9 for rooflines, icicle lights for edges)
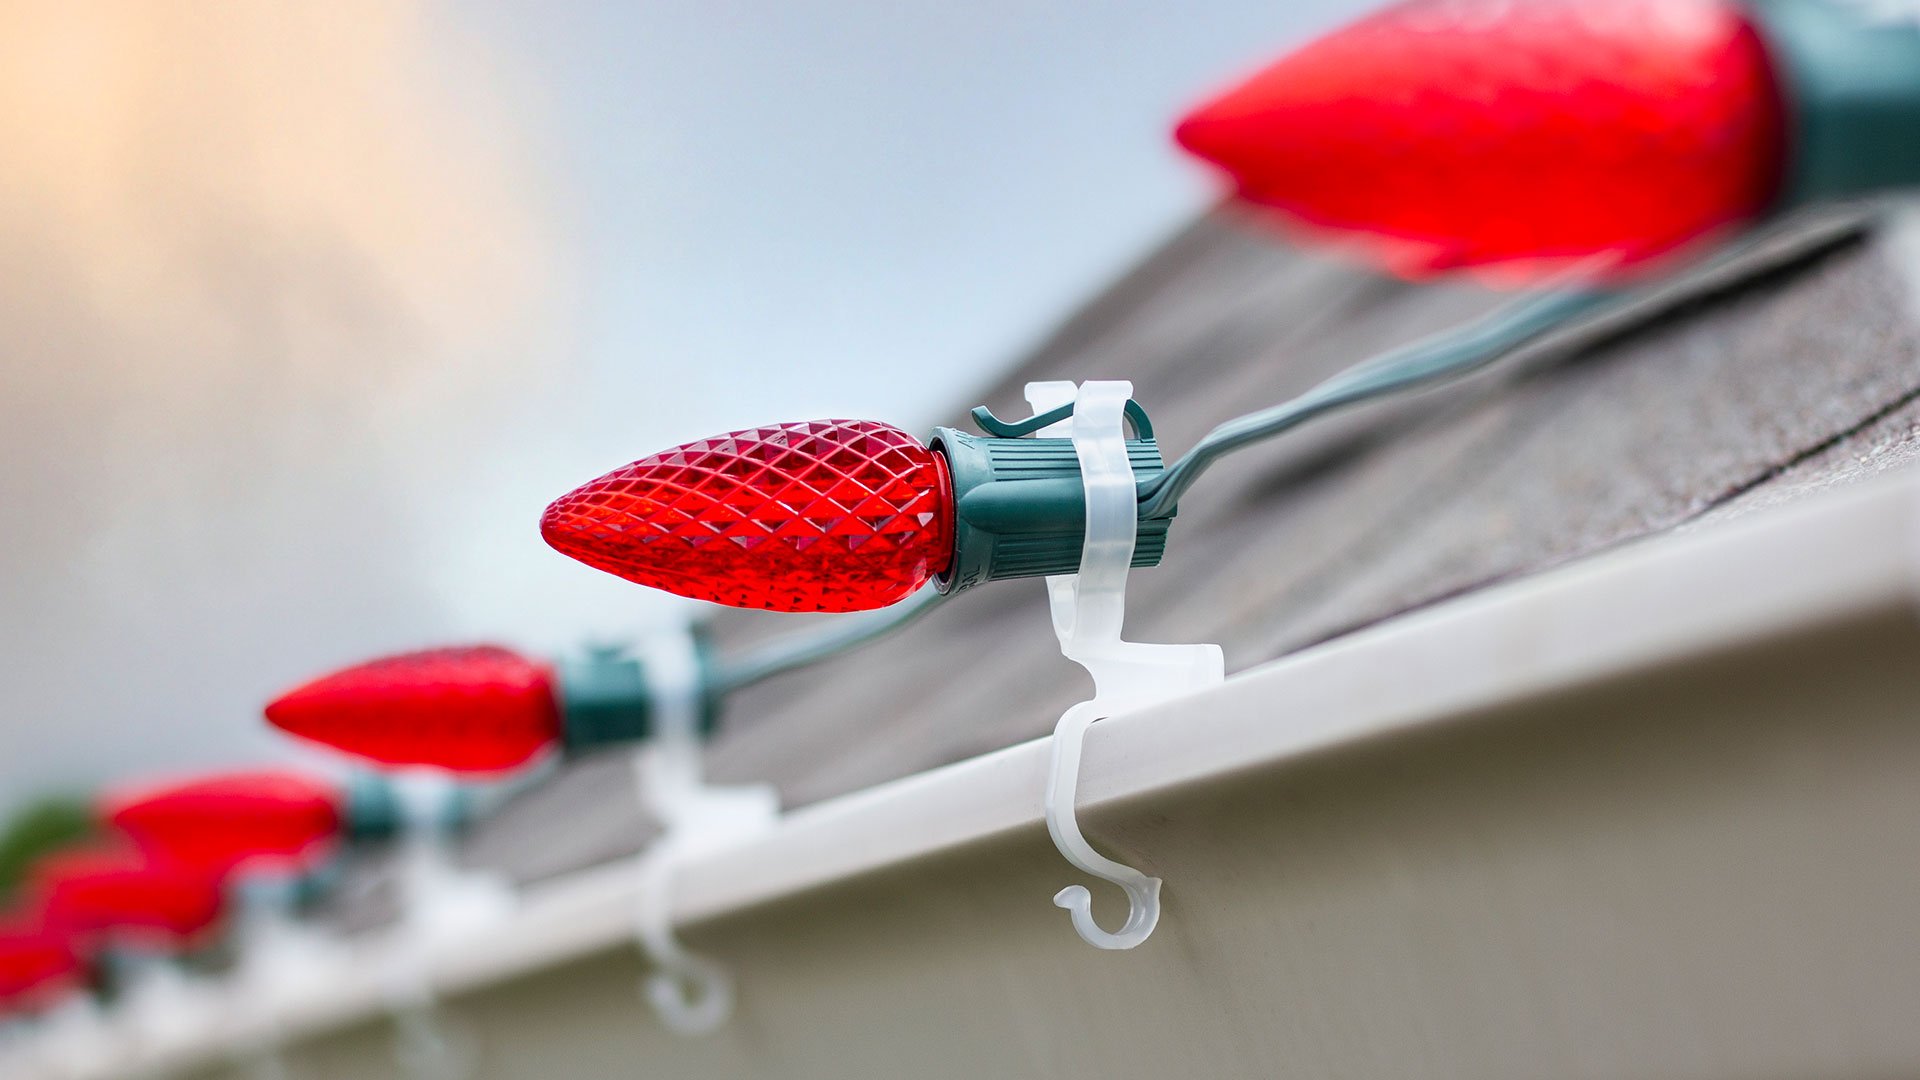
- Plastic clips (gutter hooks, shingle tabs, magnetic clips for metal roofs)
- Outdoor extension cords
- Timers or photocells
- Surge protectors and GFCI-protected outlets
- Weatherproof tape
- Zip ties
- A sturdy extension ladder
Test all lights before climbing. A burnt-out strand is easy to replace on the ground—not when you’re hanging off the edge of the roof.
Plan Before You Climb
A fast installation starts before you ever touch a ladder. Grab a tape measure and map out your roofline.
- Measure eaves, peaks, ridges, and gables.
- Calculate how many strands you need based on spacing.
- Know where your power source is.
- Add 10–20% extra clips and lights for backups.
This planning step eliminates the most common mistakes: running short of lights, uneven spacing, and messy layouts.
Step-by-Step: How to Install Christmas Lights on Your Roof
1. Install Clips First
This is the biggest time-saver. Instead of fighting clips on the roof, attach most of them while standing safely on the ladder.
- Space clips 12–18 inches apart.
- Make sure the line stays straight—use a chalk line for accuracy.
- Clear debris from gutters before clipping.
2. Climb Safely and Start From the Outlet
Start at the power source so cords lay naturally.
- Keep light tension as you press the cord into each clip.
- Face all bulbs outward for a clean, uniform look.
- Work in one direction to maintain consistency.
Never tuck light cords under shingles—this breaks the waterproof seal and invites leaks.
3. Secure Corners and Peaks
Corners and roof peaks are the tricky zones.
- Use roof-peak clips to anchor the top lines.
- For steep peaks, use a ladder stabiliser or a light-hanging pole.
- Avoid stepping on roof edges—this is where slips happen most.
4. Connect Power the Safe Way
Once everything is clipped and positioned:
- Use outdoor-rated extension cords.
- Keep all connections elevated—never touching the ground.
- Form a drip loop so rainwater doesn’t run into the outlet.
- Plug into a GFCI outlet.
Add a timer or photocell so your lights turn on and off automatically.
5. Inspect From the Ground
Step back across the street and check:
- Straightness
- Even spacing
- Dark spots
- Sagging
Make adjustments before packing up.
Different Roof Types Require Different Techniques
Your roof material determines which clips you should use and how gentle you need to be.
Shingle Roofs
- Use gutter hooks or clips that slide under the drip edge.
- Never lift shingles—doing so breaks the seal and causes leaks.
Tile Roofs
- Use tile-specific clips that hook under the tile lip.
- Avoid pressure; tiles crack easily.
- Zip-tie lights to areas between tiles without forcing anything.
Metal Roofs
- Use magnetic clips if the metal is magnetic.
- Clean the surface before placing magnets.
- Command-style adhesive strips work if magnets do not.
Each roof type has a damage-free method—stick to roof-safe hardware only.
Common Mistakes to Avoid
- Using nails, screws, or staples
- Hanging indoor lights outdoors
- Installing during wet weather
- Overloading circuits
- Pulling or tugging lights during removal
- Skipping the testing step
- Leaving cords loose where the wind can catch them
- Overextending your ladder instead of repositioning it
Avoiding these mistakes saves your roof and reduces your risk.
Troubleshooting
Flickering lights: Check if moisture entered the plug or socket.
Sags: Add clips or reduce spacing.
Dark spots: Replace bulbs one at a time—LEDs often use parallel circuits.
Wind issues: Add more clips at corners and peaks.
Small fixes early prevent bigger issues later.
How to Remove and Store Your Lights
Taking down lights the wrong way causes more damage than installing them.
- Unplug lights before removing.
- Remove one clip at a time—no pulling.
- Coil each strand carefully.
- Wrap lights around cardboard or a storage reel.
- Store in a cool, dry space.
- Label bins by roof section for easy reinstallation next year.
Proper storage keeps lights working for years and eliminates the “tangled nightmare” problem.
Final Thoughts
Installing Christmas lights on your roof doesn’t have to be stressful or risky. With the right tools, safe conditions, proper clips, and a clear plan, you can create a clean, festive look without damaging your home.
If your roof is high, steep, or you’d rather stay off ladders altogether, professional installers are worth it. Safety comes first—and a polished result is guaranteed.
Need a Professional to Handle the Roof?
If your roof is steep, high, or you’d rather avoid the ladder completely, let the experts handle it. Ware Landscaping installs Christmas lights safely, cleanly, and with a professional finish—no risks, no hassle, no roof damage.
Book your holiday lighting installation with Ware Landscaping today and get a display that looks flawless from every angle.